

Timesheet Guides
Claiming Expenses
Contractors are not automatically given access to claim for Expenses, as most contracts do not include the reimbursement of expenses. For this reason, you may see the below message.
If you require access, please speak to your Consultant at Spectrum IT Recruitment.
Entering Your Expenses
To begin, click Claim on the Expenses menu.
This will generate an Expense Sheet for you to complete.
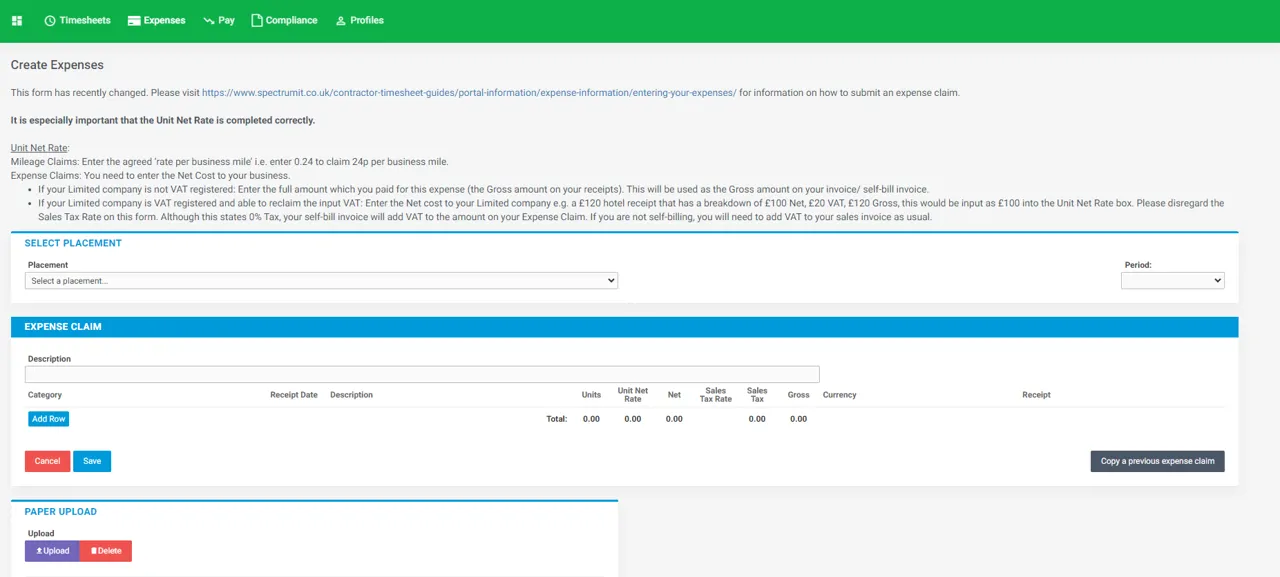
Placement: Select the required Placement from the drop-down menu. If the dates which you would like to claim for are greyed out, try selecting a different placement.
Period: Select the week which your expenses relate to.
Description (top right): Optional. This information will be visible to your Approval Manager but it will not be included on your self-bill invoice. You will then have a table to complete. Each expense claim should be entered on separate lines.
Category: Select Mileage or Expense Claim, as applicable.
Receipt Date: Select the date that the expense was incurred. This will be the date of your receipt.
Description: This is mandatory. Detail the reason you incurred this expense. This will help your Approval Manager understand why they should authorise this expense so add as much detail as you can.
Units: In the case of Mileage, this field is for the number of miles you completed for this journey. For all other expenses, this is the number of items you purchased.
Unit Net Rate:
Mileage Claims: Enter the agreed ‘rate per business mile’ e.g. enter 0.45 to claim 45p per business mile.
Expense Claims: You need to enter the Net Cost to your business.
Not VAT Registered: Enter the full amount which you paid for this expense. This will be the Gross amount on your receipts. This will be used as the Gross amount on your invoice/ self-bill invoice.
VAT Registered: Enter the Net cost to your Limited company e.g. for a £120 hotel receipt that is made up of £100 Net and £20 VAT, input as £100 into the Unit Net Rate box. Please disregard the Sales Tax Rate on this form. Although this states 0% Tax, your self-bill invoice will add VAT to the amount on your Expense Claim. If you are not self-billing, you will need to add VAT onto the sales invoice as usual.
Sales Tax and Gross: This is automatically calculated by the portal. As mentioned above, the Sales Tax Rate will state 0%. However for VAT Registered Limited companies, VAT at the standard rate will be added onto self-bills/ Limited companies should add VAT onto their invoice.
If you need to claim for more items, click the Add Row button, bottom left, to enter more lines. Carefully check the details you have entered.
Send for approval: When you are satisfied with what you have entered, click the Save button at the bottom. You may be asked to review the expense before it is submitted for approval. Your Expense Claim will then go to your Approval Manager(s) for authorisation.
Your Approval Manager(s) will then receive an email, alerting them that they have an Expense Claim to authorise. You will receive an email confirming whether your Expense Claim(s) are Approved or Rejected.
If an Expense Claim is not approved within 30 days of it being submitted, it will revert back to Draft. You will be able to find this expense claim in your Draft folder, and you must resubmit it for approval.
Expense Status
It is useful to understand the meaning of an expense status. These are:
Draft: This is an expense that has been created but not submitted.
Submitted:You have created and submitted the expense for approval. You are not able to modify Submitted expenses so please contact Spectrum IT Recruitment if you notice a mistake.
Approved: This expense has been authorised by one of your Approval Managers as correct.
Rejected: One of your Approval Managers have refused to approve this expense. There may be a comment provided to explain why this was rejected; usually because of incorrect information. Once rejected, the expense becomes a Draft for editing and resubmitting.
If you have any further questions please email contract@spectrumit.co.uk